Saturday, March 31, 2012
Monday, March 19, 2012
windows ping through wireless interface instead of wired interface
1)
C:\Documents and Settings\>route print
2)
removing the default route using the wired
interface.
C:\Documents and Settings\>route print
2)
removing the default route using the wired
interface.
Saturday, March 17, 2012
How to Share Your Ethernet Over Wifi with Ubuntu 11.10 Linux
1)Install dhcp3 packages
#cd /etc/
#cd mkdir hostapd
#cd hostapd
#gedit hostapd_open.conf
Put the following contents into the file using the name you found from above for your wifi card (in this case wlan1):
interface=wlan1
driver=nl80211
ssid=test_AP
channel=2
hw_mode=g
5)Script to Run it Automatically
Save and exit the editor. Now change the mode of this file so it can be executed

#apt-get install dhcp3-server
2)Add Interface name,my wireless card was wlan1Edit /etc/default/isc-dhcp-server
# Defaults for dhcp initscript
# sourced by /etc/init.d/dhcp
# installed at /etc/default/isc-dhcp-server by the maintainer scripts

#
# This is a POSIX shell fragment
#

# On what interfaces should the DHCP server (dhcpd) serve DHCP requests?
#    Separate multiple interfaces with spaces, e.g. "eth0 eth1".
INTERFACES="wlan1"
3) Configure Your Packages.
Let's start with the dhcp3-server. The config file is located in /etc/dhcp/dhcpd.conf.sudo gedit /etc/dhcp/dhcpd.confJust add the following to the bottom of the file:
subnet 192.168.3.0 netmask 255.255.255.0 {
range 192.168.3.10 192.168.3.49;
option routers 10.2.144.164;
option domain-name-servers 192.168.1.1, 192.168.1.2;
option ip-forwarding off;
option subnet-mask 255.255.255.0;
option broadcast-address 192.168.3.255;
} NOTE:10.2.144.164 is your eth0 IP address ,edit according to your eth0 address.192.168.1.1, 192.168.1.2 is your dns server address it can be found out from the /etc/resolv.conf
4)Hostapd config :Make the hostapd config file for an open WIFI system:#cd /etc/
#cd mkdir hostapd
#cd hostapd
#gedit hostapd_open.conf
Put the following contents into the file using the name you found from above for your wifi card (in this case wlan1):
interface=wlan1
driver=nl80211
ssid=test_AP
channel=2
hw_mode=g
5)Script to Run it Automatically
gedit ~/hostapd/share.sh and copy the below contents to share.h
#!/bin/sh
#
# Where is your internet connection from?
INET_IFACE="eth0"
#
# You must have an active connection over your 3G network before running this script
# When you run it, it reads IP address for this connection
INET_IP=$(ifconfig $INET_IFACE |sed -n "/inet addr:.*255.255.255.255/{s/.*inet addr://; s/ .*//; p}")
#
# Using this new assigned IP from your 3G network
# We have to update dhcp.conf router with current INET_IFACE IP address
# !!Warning this sed command will change any "option routers xxx.xxx.xxx.xxx" to the INET_IP in your config file
# Modify the sed command if you need to avoid this because you have some other dhcp setup running
#sed -i "s/option\ routers\ [0-9]*.[0-9]*.[0-9]*.[0-9]*;/option\ routers\ $INET_IP;/" /etc/dhcp/dhcpd.conf
#
# Where is your wifi card?
LAN_IFACE="wlan1"
#
# We need to assign an IP address to your wifi card for the dhcp service
# Force an IP address (if you change this you need to change your dhcpd.conf file too)
Wlan_IP="192.168.3.0"
#
# Configure the wireless interface
ifconfig $LAN_IFACE down
ifconfig $LAN_IFACE $Wlan_IP netmask 255.255.255.0
ifconfig $LAN_IFACE up
#
# Start the wireless AP service layers and turn on the AP in the background with lots of debug messages (-dd)
# you can also change the -dd to -d or remove it for less messages
hostapd -dd /etc/hostapd/hostapd_open.conf &
#
# Restart the dhcp server now that the AP is up and running
/etc/init.d/isc-dhcp-server restart
Save and exit the editor. Now change the mode of this file so it can be executed
#chmod 770 share.sh
At this point you should be ready to test the system
Once you've done that make sure the switch on your wifi
card is on and run your script with sudo.
#sudo /etc/hostapd/share.sh
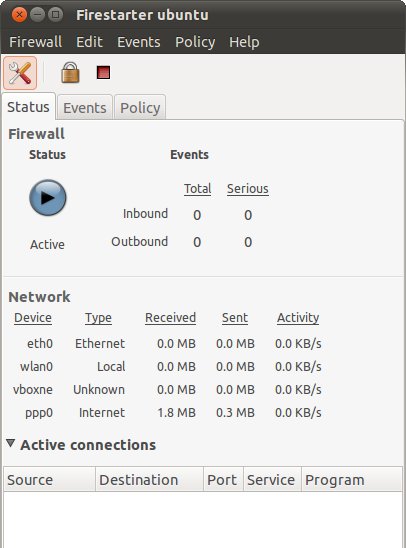
6) Setting up the Firewall:
From On your update software center install Firestarter


Next you will see your system and if you expand your connections you'll see the clients and their data rates.
Subscribe to:
Comments (Atom)